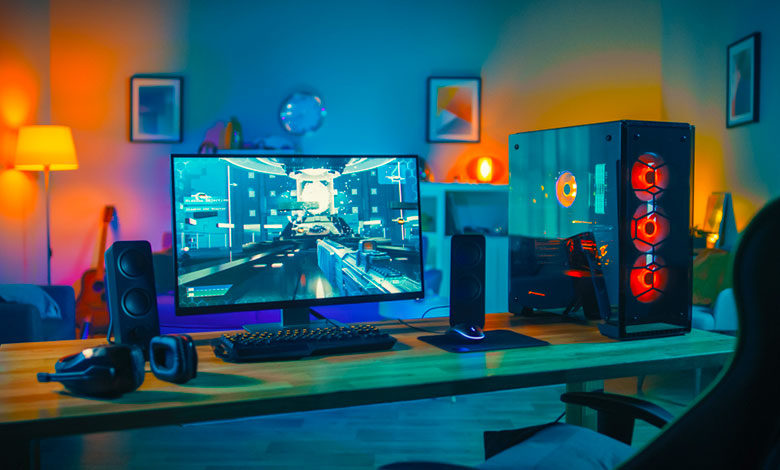
Building a gaming PC can seem like a challenging task, but it’s an incredibly rewarding experience for anyone who loves gaming and wants to customize their setup. When you build your own gaming computer, you get to choose every component based on your needs, preferences, and budget. This article will guide you through each step of the process and explain everything you need to know to successfully build your own gaming PC. Whether you’re an experienced gamer or a beginner, this guide will help you understand how to create a machine that can handle the latest games with ease.
Choosing the Right Components
The first step in building a gaming PC is selecting the right components. Each part of the computer has a specific role and needs to work well with the other parts. Let’s take a look at the main components you will need.
- Processor (CPU): The CPU is the brain of the computer. It handles all the tasks your computer needs to perform. When building a gaming PC, you’ll want a CPU with multiple cores and high clock speeds for better performance in gaming. Popular brands for gaming CPUs include Intel and AMD.
- Graphics Card (GPU): The GPU, or graphics card, is responsible for rendering images and video in games. It is one of the most important components for gaming performance. A high-quality GPU can drastically improve the visual experience in games, especially when playing games with high-end graphics. Nvidia and AMD are the main manufacturers of gaming graphics cards.
- Motherboard: The motherboard is the main circuit board of your computer. It connects all the components, allowing them to communicate with each other. When choosing a motherboard, make sure it is compatible with your CPU, GPU, and other components. There are different types of motherboards, such as ATX, micro ATX, and mini ITX, each offering different sizes and features.
- Memory (RAM): RAM, or random access memory, is where your computer stores data that it needs to access quickly. The more RAM your gaming PC has, the better it can handle running multiple applications and large games at once. For gaming, 16GB of RAM is a good starting point, but 32GB is ideal for high-performance gaming.
- Storage: You will need a place to store your games, software, and files. There are two types of storage devices commonly used in gaming PCs: hard disk drives (HDD) and solid-state drives (SSD). SSDs are faster and more reliable, which is why many gamers prefer them. A combination of both an SSD for your operating system and games and an HDD for additional storage is a popular choice.
- Power Supply (PSU): The PSU provides power to all your components. It’s important to choose a PSU with enough wattage to support your components. A typical gaming PC will need a PSU with at least 500-650 watts, but more powerful setups may require 750 watts or more.
- Case: The case is the enclosure that holds all your components. There are many different styles and sizes to choose from. Make sure the case you choose has enough space for all your components and offers good airflow to keep the system cool. Cases come in various sizes, such as full-tower, mid-tower, and mini-tower.
- Cooling System: Gaming PCs generate a lot of heat, especially when running demanding games. To prevent overheating, you’ll need a good cooling system. Most cases come with built-in fans, but you may also want to add additional fans or a liquid cooling system for better performance.
Assembling the Gaming PC
Once you have all your components, it’s time to put everything together. Follow these steps carefully, and take your time to ensure everything is installed correctly.
- Prepare the Case: Start by opening up your case and laying it flat on a stable surface. If you need to install any additional fans or hardware like hard drives or SSDs, now is the time to do it. Make sure your case has enough room for everything.
- Install the CPU: The CPU is one of the most delicate components, so be careful when installing it. Open the CPU socket on the motherboard, gently place the CPU into the socket (aligning the notches), and then lock it in place. Make sure the CPU is seated properly and doesn’t move.
- Apply Thermal Paste: If your CPU doesn’t come with thermal paste pre-applied to the cooler, you will need to add a small amount. The thermal paste helps to transfer heat from the CPU to the cooler. Use a small pea-sized amount in the center of the CPU and spread it evenly.
- Install the CPU Cooler: Attach the CPU cooler to the motherboard, making sure it’s aligned with the mounting holes. If you’re using a liquid cooler, follow the instructions for attaching the radiator and fans.
- Install RAM: Insert the RAM sticks into the motherboard’s RAM slots. Most motherboards have color-coded slots for dual-channel memory, which can improve performance. Press down firmly until the RAM clicks into place.
- Install the Graphics Card (GPU): Slide the graphics card into the PCIe slot on the motherboard. This is the long slot closest to the CPU. Press down gently until it clicks into place. If necessary, secure the card using screws to the case.
- Install Storage Drives: Install your SSD or HDD into the appropriate slots in the case. Many cases have specific areas for mounting 2.5-inch SSDs or 3.5-inch HDDs. Connect the drives to the motherboard using SATA cables (for HDDs and SATA SSDs) or M.2 slots (for NVMe SSDs).
- Connect Power Supply (PSU): Install the PSU into the bottom or top section of your case, depending on your case design. Make sure to secure the PSU with screws. Then, connect the power cables from the PSU to the motherboard, CPU, GPU, and storage devices. Ensure that everything is properly plugged in and secure.
- Connect Front Panel and Additional Components: Attach the front panel cables, such as the power button, reset button, and USB ports, to the motherboard. These cables are usually labeled and should be connected to the appropriate pins on the motherboard.
- Final Check: Double-check all connections and make sure everything is properly seated. Ensure the cables are organized to allow proper airflow and avoid any short circuits.
Testing Your Gaming PC
Once your gaming PC is assembled, it’s time to power it up and test everything. Follow these steps:
- Power On the PC: Connect the power cable to the PSU and turn on the switch at the back. Then, press the power button on the front of the case. If everything is set up correctly, you should see lights and fans spinning.
- Enter the BIOS/UEFI: The first time you turn on your PC, you may need to enter the BIOS/UEFI settings to ensure everything is recognized. To do this, press the designated key (usually F2 or Delete) during the boot process. Here, you can check the status of your CPU, RAM, and storage devices.
- Install the Operating System: If everything looks good in the BIOS, it’s time to install the operating system (OS). Most gamers use Windows for gaming, so you’ll need to download the latest version of Windows onto a USB flash drive and boot from it. Follow the on-screen instructions to install Windows.
- Install Drivers: Once the OS is installed, you will need to install drivers for your components, especially your GPU and motherboard. You can download the latest drivers from the manufacturer’s websites. Drivers are important to ensure that your hardware works properly and efficiently.
- Test Gaming Performance: After everything is set up, test your gaming PC by playing a few games. Check the frame rates, resolution, and graphics settings to see how well your system performs. You can also use benchmarking tools to test the performance of your CPU, GPU, and storage.
Troubleshooting Common Issues
Building a gaming PC can sometimes result in issues, especially if something isn’t connected correctly or a component is faulty. Here are some common issues you might encounter:
- No Display: If your monitor shows a “No Signal” message, check that the GPU is properly installed and the monitor is connected to the GPU, not the motherboard.
- System Won’t Power On: If your PC doesn’t turn on, check the power cables and connections. Ensure the power supply is turned on and the cables are securely connected.
- Overheating: If your PC is overheating, check if the fans are running and if the thermal paste is applied properly. You may need to add more cooling or improve airflow in the case.
- Performance Issues: If your PC isn’t running games smoothly, make sure your drivers are up to date. You can also adjust in-game settings to lower the graphical demands of the games.
Conclusion
Building a gaming PC is a rewarding process that allows you to create a custom system tailored to your gaming needs. By carefully selecting the right components, assembling everything properly, and testing your setup, you can create a powerful gaming machine that will give you the best possible gaming experience. It may seem like a complicated task at first, but with the right knowledge and patience, anyone can build a gaming PC that will last for years to come. Happy gaming!